General Tab
In this Topic ShowHide
The General tab contains four main sections:
General Information
Billing Address
- Billing Information
Note: If you purchased
the optional Hospitality module and organizational billing was activated
during installation (in CAInstall - Organizational settings), a fourth
section, Organizational Billing (billing information),
will appear (as described below).
Each of these sections is described below.
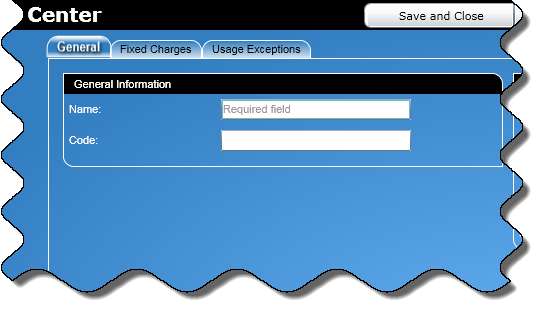
General Information Section
In this section of the General tab, you specify a name and code the
following for the organization level.
|
To enter data in the General
Information section, perform the following:
In the Name text box, enter
the name for the new organization level. This is required
and the name has a maximum of 50 characters. In the Code text box, enter a code for the new organization
level. This is required and the code has a maximum of 20 characters. If the Language option was activated during installation,
a Language list box will appear. From this list box, select
the language that certain reports will appear in for everyone
in the organization level. |
 Back
to top
Back
to top
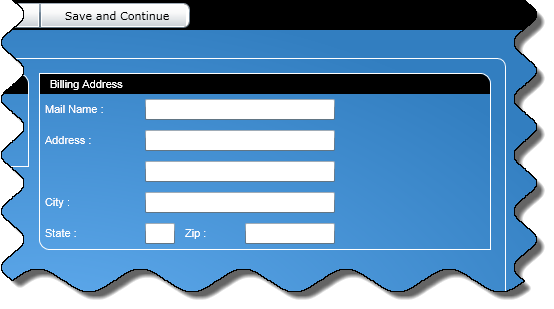
Billing Address Section
In this section of the General tab, you specify information that will
appear in a tenant billing report.
Note: Completing
this section is optional and fields will only appear if they were selected
in Configure Directory.
To enter data in the Billing
Address section, perform the following:
In the Mail Name text box,
enter the name that will appear in a tenant billing report.
If a name is not entered, then the name entered in the General
Information section will appear in the tenant billing report.
There is a maximum of 50 alphanumeric characters. In the Address text boxes,
enter the first and second lines of the address that will
appear in a tenant billing report. For each text box, there
is a maximum of 50 alphanumeric characters. In the City text box, enter
the name of the city that will appear in a tenant billing
report. There is a maximum of 25 alphanumeric characters. In the State text box,
enter the name of the state that will appear in a tenant billing
report. There is a maximum of 2 characters. In the Zip text box, enter
the ZIP code that will appear in a tenant billing report.
There is a maximum of 10 characters. |
|
Back
to top
Billing Information Section

In this section of the General tab, you can add billing descriptions
and carriers at each organizational level.
The Billing Information section
consists of the following:
Add/Search section
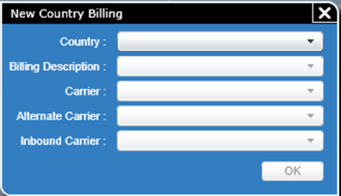
The Add button,  , will
add a new country billing to the grid.
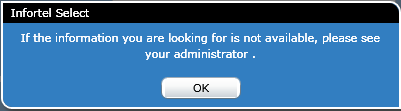
, will
add a new country billing to the grid.
 Click for more information on adding a country billing.
Search
The dynamic Search
text box will allow you to search for data in any field of the grid.
Note:
There is also a page control bar to navigate through the list contained
in the grid.
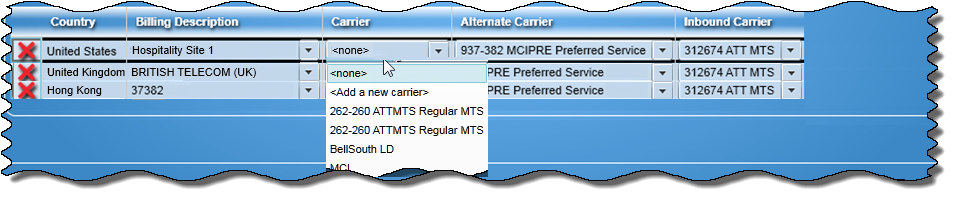
Billing Information Grid
Below the control buttons is a grid which consists of the following
columns:
Delete Button
The Delete button  will
allow you to delete the Billing Information for that row.
will
allow you to delete the Billing Information for that row.
Country
This column specifies
the country chosen for the billing description (display only).
Billing Description
You can
add or modify a Billing Description from the drop down
list.
Carrier
This field provides
a list from which you can choose an available (primary) carrier.
Alternate Carrier
This field provides
a list from which you can choose an alternate carrier.
Inbound Carrier
This field provides
a list from which you can choose an inbound (incoming) carrier.
Carrier Attributes
Note: The following
information applies to all three carrier options i.e. carrier, alternate
carrier and inbound carrier.
Note: Depending on the number of available carriers,
this field will either have a drop down list or a lookup button.
- If there
are 20 or less carriers available, a drop down list will be displayed
from which you can choose a Carrier.
Click
for an example of a special billing screen
using carrier drop down lists.
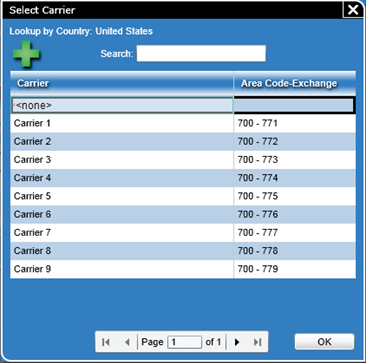
- If
there are more than 20 carriers available, a text box (no drop down)
will be displayed with a Lookup button,
 , to the right of the carrier field.
Click for an
example of a special billing screen using carrier lookup buttons.
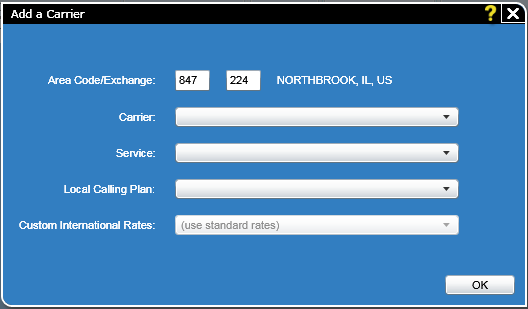
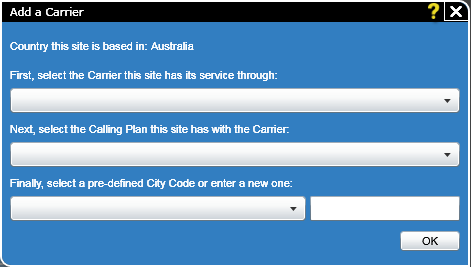
Click for information
regarding adding a Carrier-NANP as well as a Carrier-non-NANP.
Saving Information
Click the Save and Close button to save the information for
the organization level entered at any of the tabs and close the Add
"Organization" or Edit "Organization" screen.
Note:
A organization name is required and it needs to be unique in its organization
level.
When you click the Save and Continue button, the information
entered at any of the tabs for the new organization level entered
is saved and a blank Add "Organization" screen will open
where you can add another organization level.
Note:
When adding an organization, an organization name is required
and the name needs to be unique in its organization level.
When editing an organization level and after clicking this button,
the information for the next organizational entity in the directory
tree will appear. When you reach the bottom of the directory tree,
you will be taken back to the top of the current organization level.
Back
to top