In this Topic Hide
Note: The following functionality information applies to all three carrier options i.e. carrier, alternate carrier and inbound carrier.
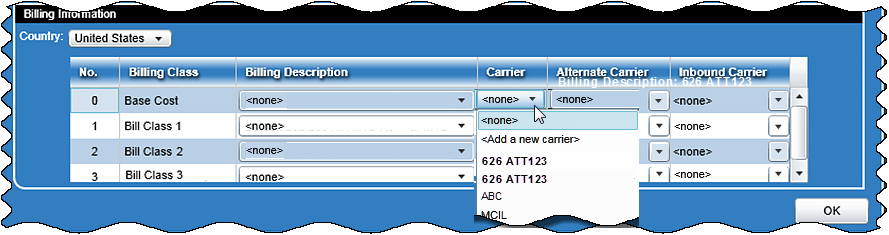
Note: The default option is set to <none>.
 ,
to the right of the carrier field (as shown in the following screen).
,
to the right of the carrier field (as shown in the following screen).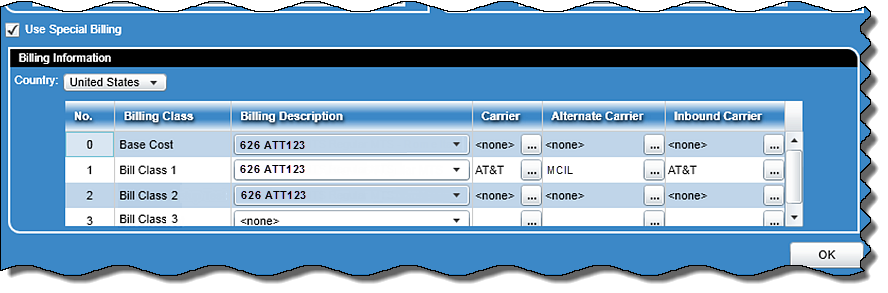
The country that was chosen in the billing information section is displayed at the top of the screen.
There is an Add icon,
 ,
and when clicked, the
Add a Carrier screen (described below) will be displayed. If
no Master Rate Table is available, the Add icon will not be available.
,
and when clicked, the
Add a Carrier screen (described below) will be displayed. If
no Master Rate Table is available, the Add icon will not be available.
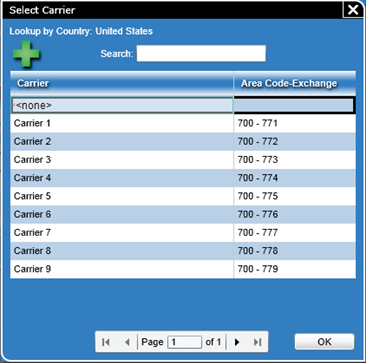
A dynamic search is available to narrow the list of carriers.
The grid contains a list of the available carriers plus the Area Code-Exchange. The Area Code-Exchange will be blank when it is not applicable.
The first line shown in the list is set to ‘<none>’ (default).
You can choose a carrier by clicking in the desired row.
Note: When you click OK, the system will make the carrier entry on the calling screen.
Note: If the country is set to United States or Canada and you choose the <Add a new carrier > option the following Add a Carrier screen will be displayed.
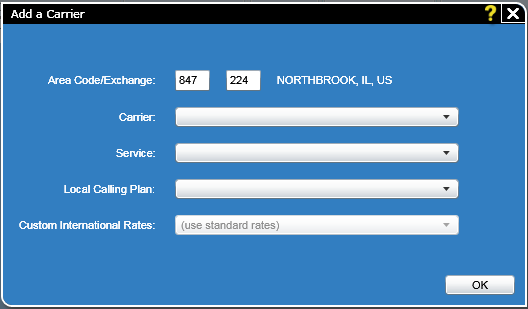
This screen consists of the following fields:
There are two text boxes for the three-digit area code (e.g. 630) and the three-digit exchange for the master rate table (e.g. 706). Once this information is entered, the city and state information will be displayed as text to the right of these text boxes (e.g. Hinsdale, IL, US).
This field has a drop down box that contains all the carriers supported by the master rate table.
This has a drop down box that contains all the long distance services supported by the selected carrier. If the selected carrier contains only one long distance service, the drop down will be grayed out and automatically populated with the available service.
This is a drop down box that contains all the local calling plans for the selected service/carrier combination. If there is only one local calling plan, the drop down will be grayed out and automatically populated with the available plan.
This is drop down box that contains all the custom international rates that have been installed on the system. The default is to use standard rates. If a selection is made, those rates will be used instead of the international rates in the master rate table file.
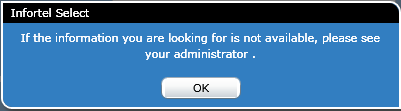
Note: There is a help icon that will instruct you to check with the administrator if the information you need is not available (as shown below).

Note: If the country chosen for the billing information is not the United States or Canada and you choose the <Add a new carrier > option the following Add a Carrier screen will be displayed.
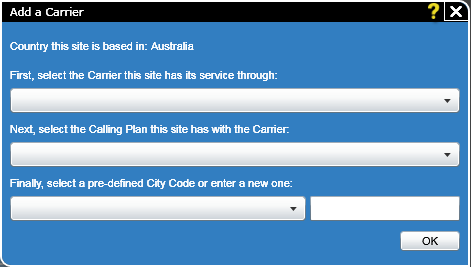
This screen consists of the following fields:
The title displays the given country name (e.g. Australia).
This field has a drop down box that contains all the carriers supported by the master rate table.
This field has a drop down box that contains all the calling plans for the selected carrier. If there is only one calling plan, the drop down will be grayed out and automatically populated with the available plan.
This field has a drop down box that contains a list of pre-defined codes. If the code needed is not in the list, you can enter a new code in the text box to the right of the drop down.
Note: When the OK button is pressed, the service will be installed.