In this Topic Hide
The Field Mapping tab is divided into the following sections:
Search
Fields
Columns
Add Columns
In the Search text box, you can enter the search criteria, and when you type, the field names listed will shorten depending on the search criteria.
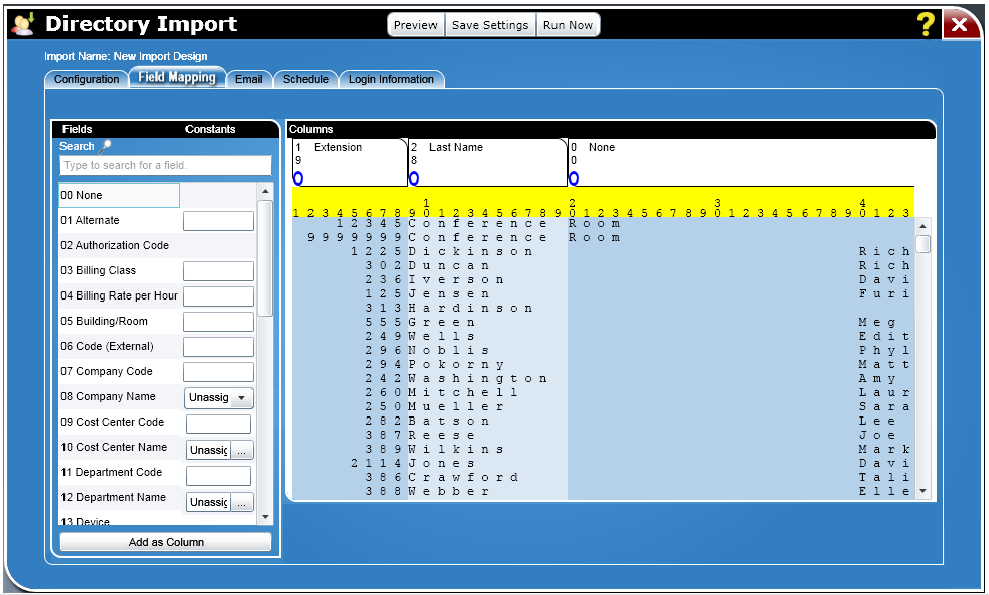
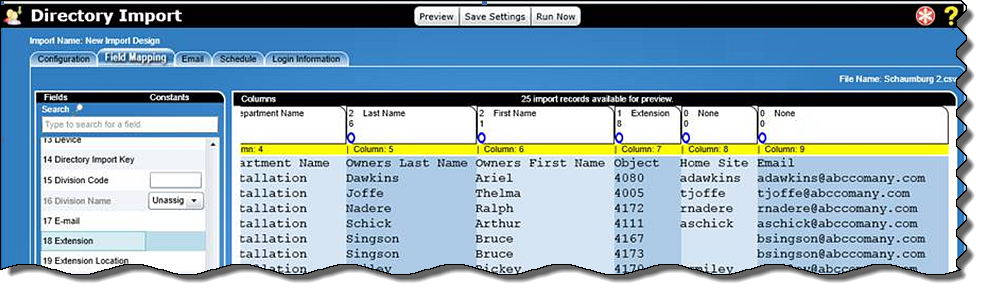
The Fields section contains field names that can be assigned as columns. After determining the format of the data and, in the case of a delimited file, specifying a separator and delimiter, you can assign the fields to the appropriate columns by dragging and dropping them or clicking the Add as Column button.
Note: If you have not entered the data for the required fields (Data Source; Network Path; Source File) on the Configuration tab before accessing the Field Mapping tab you will not see the Fields (field list) and the records. Instead, you will get the following message:
“You need to enter <list of missing fields> in the Configuration tab before the source file and mapping can be displayed”
Note: In the field list, it will list everything that was not filled out. The required fields are: Data Source, Network Path, and Source File.
On the left hand side of the screen are all of the fields that can be imported into the directory. To indicate which field name is matched to which field in the file, you can click and drag the field name to the correct column.
Delimited import file: when the file is delimited you can either drag fields over the columns or use the “Add as Column” button.
Fixed Length import file: If you choose the fixed length file you can drag the fields over the sample and then adjust the length of the column header to the correct size for the field. You can also use the “Add as Column” button.
Unless the option, Import People without objects is chosen (set in Configuration section), each record must have at least one of the following defined:
Extension
Auth Code
Facility
Device
Note: In all cases Last Name or Full Name is a required field.
Next to some fields is a text box that allows a constant to be entered. This provides the following functionality (relates to both the Fields and Columns sections):
If a field has not been mapped to a column, the value entered here goes into every imported record.
If a field has been mapped to a column, for those import records without a value, this value is used. If the record has its own value, that value is used instead of the constant.
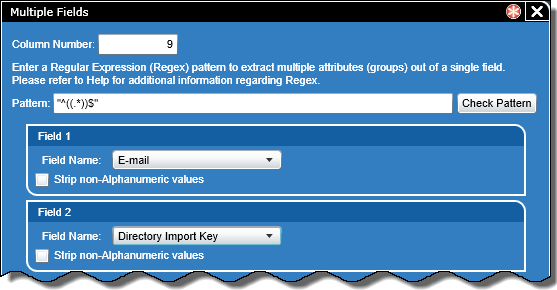
This multiple fields option will enable you to split one field into multiple fields. Also this field can be used on multiple columns.
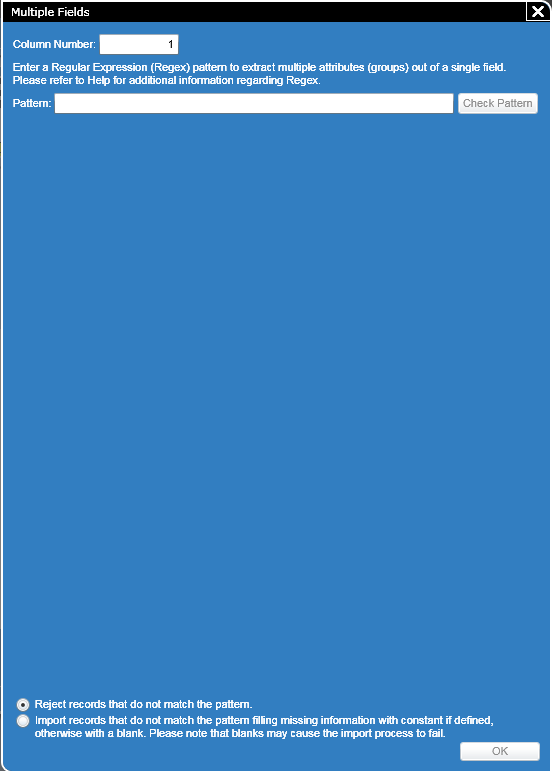
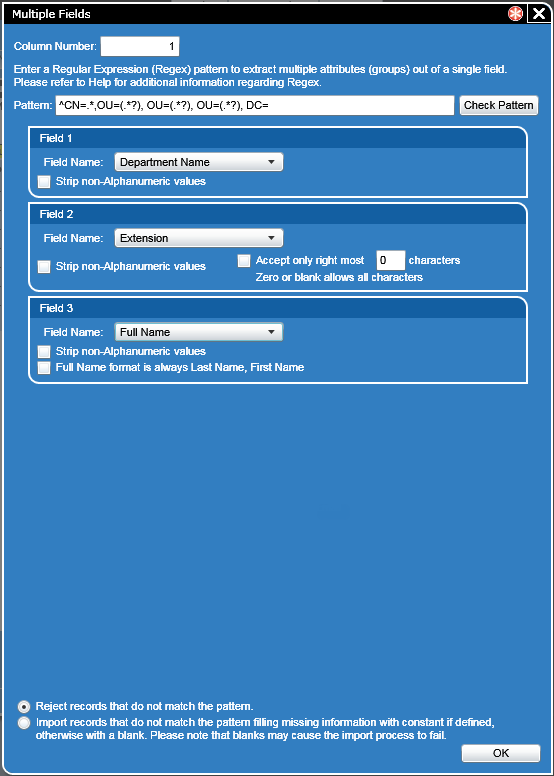
When you add Multiple Fields as a column to the list in the Field Mapping tab, and click on the blue properties circle for that field, the following dialog box will be displayed:
This section contains the following fields:
At the top is the text “Enter a Regular Expression (Regex) pattern to extract multiple attributes (groups) out of a single field. Please refer to Help for additional information regarding Regex.”
Note:
![]() Click for additional information regarding Regex.
Click for additional information regarding Regex.
Note: The Column Number provides a number for the column which contains this specified field.
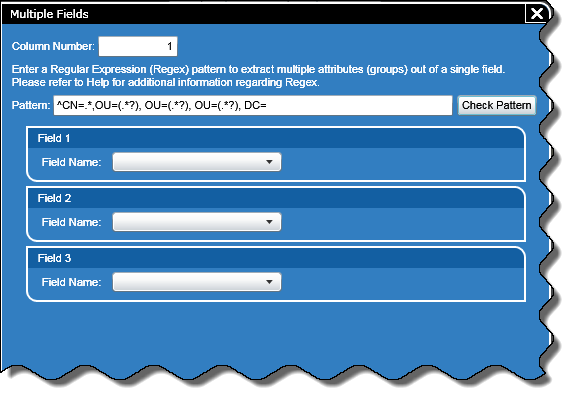
Pattern - You have to enter the regex pattern that will be used to split the field into multiple fields.
Next to the pattern field is a Check Pattern button. When you click the button, the pattern will be checked for validity.
"Invalid Regex pattern. Please correct the pattern"
Note: Default is unchecked.
Reject records that do not match the pattern – by default, this option is on and means that if a record does not match the pattern it is rejected and the reason is logged.
Import records that do not match the pattern filling missing information with constant if defined, otherwise with a blank. Please note that blanks may cause the import process to fail – by default this option is off. The behavior if this is ON is defined in the wording of the option. An example of this might be that the pattern doesn’t match for an organization level. Because that is blank, it would be filled by the default hierarchy choice. Another example would be a missing email address. In that case, that person will not have an email address in the directory.
When you click OK this will save the parsing rules and fields. The following fields are allowed to have multiple entries:
Auth Code
Device
Extension
Report as Extension
Extension Location
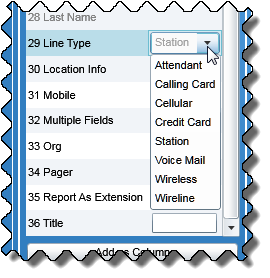
Line Type
The fields list provides information pertaining to the fields available and their default names.
![]() Click for more information on the fields list.
Click for more information on the fields list.
The field options provide various field settings for delimited and fixed length records:
![]() Click for more information on the field options.
Click for more information on the field options.
The Fields section contains field names that can be assigned as columns.
Columns for delimited file:
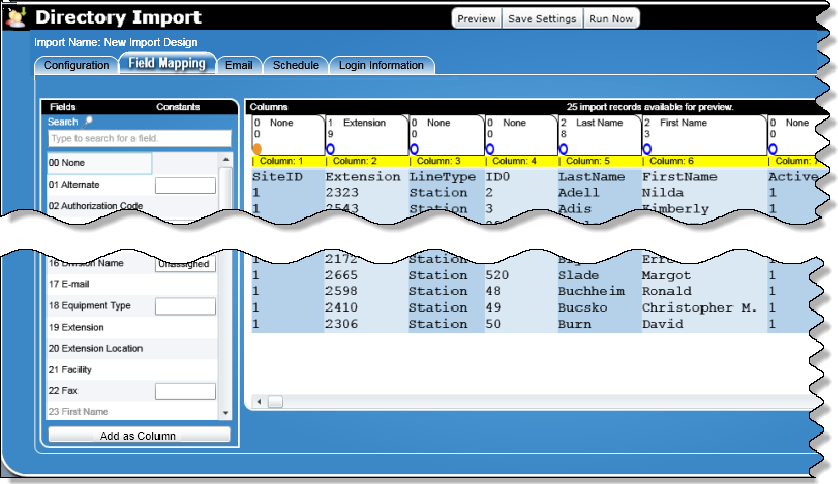
In the beginning each column is labeled “None”.
In the columns section the number of records displayed depend on what was entered on the configuration screen and broken into fields. After determining the format of the data and, in the case of a delimited file, specifying a separator and delimiter, you can assign the fields to the appropriate columns by dragging and dropping them or clicking the Add as Column button.
Columns for fixed length file:
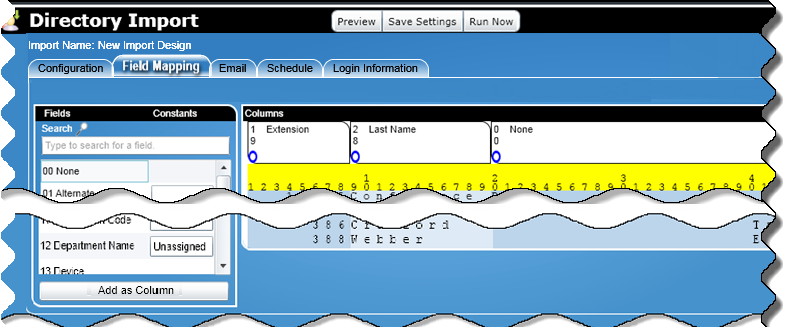
In the beginning it is all one large column labeled “None”.
In the columns section the number of records displayed depend on what was entered on the configuration screen and broken into fields. You can drag over the fields and adjust the size of each column width of each field either by where you place the next column or by setting it in the field options. You can also use the “Add as Column” button.
 , with a
search option for you to choose a single value.
, with a
search option for you to choose a single value.