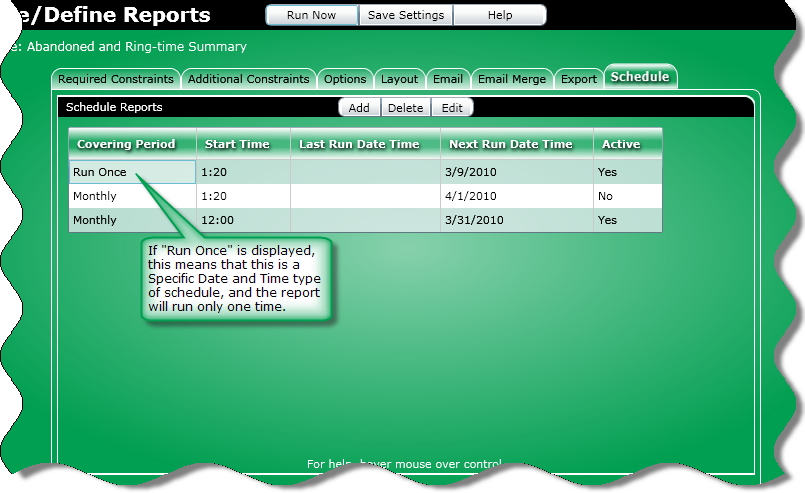
At the Schedule tab, you can:
Create, delete, or edit, a report schedule
Display previously created report schedules

To create a schedule, click the Add button to create a new report schedule.
To delete a schedule, perform the following:
In the list of schedules, select the schedule you want to delete.
Click the Delete button.
A dialog box will ask you to confirm the delete.
Click Yes.
To edit a schedule perform the following:
In the list of schedules, select the schedule you want to edit.
Click the Edit button.
The selected schedule will appear in a Schedule dialog box.
Make the necessary changes, and click the OK button.
The Schedule dialog box will close and the revised schedule will be displayed.
Tip: Click a column heading to sort the grid by that heading.
Covering Period: This column displays the time period the report schedules covers.
Start Time: This column displays the time the report schedules will run.
Next Run Date Time: This column displays the next time report schedules will run.
Last Run Date Time: This column displays the last time report schedules ran.
Active: This column displays that the report will or will not run automatically based on whether or not the Active check box was clicked when the schedule was created.